 Another light fitted! This time it was the high level brake light on the roll bar. It's a Hella strip LED light, screwed into a moulded acrylic mounting block, screwed into the roll bar. The cables run internally down through the roll bar, and in under the boot where they are connected into the loom via a 2 pin removable connector. Light mounting was easy....cable routing was done after the bar was fitted, which was not easy (had to pull the cable through at least 6 times). I chose not to drill the holes and mount the light until the car was back on the ground on its wheels to ensure the mounting was level with the road.
Thursday, March 29, 2012
High Level Brake Light
Another light fitted! This time it was the high level brake light on the roll bar. It's a Hella strip LED light, screwed into a moulded acrylic mounting block, screwed into the roll bar. The cables run internally down through the roll bar, and in under the boot where they are connected into the loom via a 2 pin removable connector. Light mounting was easy....cable routing was done after the bar was fitted, which was not easy (had to pull the cable through at least 6 times). I chose not to drill the holes and mount the light until the car was back on the ground on its wheels to ensure the mounting was level with the road.Shift Lights
 |
I folded up a nice little sheet aluminum mounting bracket (painted black of course), and it is screwed down under the scuttle pad, with the cables routed through the top of the scuttle and down to the tacho.
Tuesday, March 27, 2012
Windscreen Wipers
 The wipers went on quite a few weeks back, but they didn't work as expected. First problem was that I didn't interpret the manual correctly on how to align the linkage to get them to operate in the right cycle. Second problem was that I stripped one of the nuts getting them back up, meaning I had to cut the nut off, which damaged the mounting spline. Luckily I had a spare linkage, so I dropped the damaged one out and replaced it. To get the cycle right I ended up climbing under the dash in Steve's Birkin, and copied how it was aligned and connected to the motor. We also made up some markers to fit to the spindles to get the cycle right. Once we were comfortable with the sweep of the arm, we bolted the arms into place and fitted the bolt caps. Must remember not to tighten things before I check how they are supposed to work.
Sunday, March 25, 2012
Lighting - Front Indicators
 The front indicators were a bit of a pain. They required drilling holes into the finished (painted!) nose cone to allow the stalks ti be bolted through the fibreglass. There are two small bulges in the fibreglass that you drill out to fit the nose mounted indicator stalks to. Not a pleasant experience and I remembered the tip to use blunt bits, just after I used perfectly new bits to chip and gouge the paint! I had to take the nose on and off 3 times to modify its position and to run the wiring down from the loom to the stalks. Anyway they are on and they work. Glad that's over! Oh and it also allowed me to fit the grill.
Friday, March 16, 2012
Roll Bar and Boot Lining
I have been desperate to get the boot lining off the garage floor and into the car for nearly 12 months. It is made of fairly thin GRP, and has two protruding strips where it meets the cockpit. Every time the kids went in the garage I was worried that someone would walk into and snap those strips off!
To get the boot in meant finishing all the rear wiring and lighting, checking all the suspension bolts, putting a moisture trap line on the fuel reg, checking all the fuel lines and clamps and then remounting the fuel tank in its proper place. When I went to mount it, I realized I had to lift out the cockpit side panels to get the front edge of the boot lining under the side panels. The side panels had already been bolted in place under the scuttle which meant some disassembly. However I soon had the boot lining in place.
The roll bar sits on top of the boot liner and bolts into the rear body rail and onto a pair of mount plates high on the frame behind the seats. Securing the roll bar uses huge M10 capscrews and requires manipulation of a few chassis cross members to fit it and get the capscrews in. I now need to mount the high level light now and get the wiring run inside the roll bar.
Reversing lights
Still working on wiring lights up. This time it was the reversing lights. I had already routed the rear loom around the fuel tank, so it was just a matter of positioning them and then drilling holes to mount them and route the wiring through. Before that I shifted the fuel tank forward and fitted a big piece of hardwood between the tank and the rear of the car - no sense in drilling the tank. The lights have a rubber base mount which also has a built in wiring grommet that allows centering of the mount. Pretty easy mounting exercise and best off they worked when tested.

Saturday, February 25, 2012
Windscreen
 The windscreen mounts were the first holes I drilled into my shiny new aluminum car back in 2010, before paint. Lining up the holes for windscreen mounts was a little tricky and it would be some time before I got to see if I had them right. The windscreen mounts and windscreen frame were painted gloss black at the time that the car was painted. Surprisingly the mounts fitted well with no modifications needed. I put them in finger tight so I could trial fit the windscreen. With the windscreen roughly in place, I could drill two holes in the scuttle either side for the windscreen demister. Then it was just a case of getting the rest of the family to hold the windscreen in place while I secured it inside the windscreen mounts.
  The windscreen fits fairly snugly, although there is a small gap between the bottom of the left mount and the screen which is making it hard to get the capscrew to bite into the thread. I will probably just use a longer capscrew for this. Tightening the screws damaged the paint a little on the mounts, so I will need to do a few touch ups and I will also paint all the cap screws black as well. Now its all torqued up correctly ready to be wired in. I can now fit the wiper arms onto the mounts as well.
Bonnet

Thursday, February 23, 2012
Nose Cone

Thursday, February 16, 2012
Headlights with power
I connected up and tested the wiring for the headlights last night, and sorted out low/high beam and the parking lights. No parkers! Who the hell sells headlights without the parking light globes? Now I will need to pull the shells apart and then remove the globe holders to get the right globes.
Either way they worked so thats another thing crossed off the list. I just need to route and secure the wiring correctly now, then once the car is back on the ground I can align them to their final position and tighten them up.
Either way they worked so thats another thing crossed off the list. I just need to route and secure the wiring correctly now, then once the car is back on the ground I can align them to their final position and tighten them up.
Monday, February 13, 2012
Headlights

Saturday, February 11, 2012
Seats

Are in. Will probably need to remove them to fit my road legal harnesses (if they arrive before rego!)
Scuttle Fitout
With the scuttle mounted, I am able to finish off all the under the bonnet jobs. There are a number of things that get mounted directly onto the scuttle under the bonnet line.
 The brake and clutch reservoirs are bolted directly onto the scuttle and the low fluid warning light cables are fed up through the bracket and onto the switches.
 Finishing the scuttle also means getting all of the electrical connections finished. The fuse rail is now secured in the fusebox with a rivnut and a set screw in the passengers footwell. The fusebox lid has been modified to fit around the bottom of the throttle body and is screwed onto the bulkhead.
 On the far side away from the scuttle is the washer bottle. Its line runs from the pump through a small hole in the bottom of the steering column bush. The wiring feeds through a grommet in the scuttle below the tank and then up inside the bracket to connect to the pump. On the passengers side is a 1 litre expansion tank, which is mounted as the highest point in the cooling system. It has feed lines from the block and main cooling pipes, and returns to the thermostat. All of the cooling lines run down behind the block. Its all now tidy enough to fit the bonnet (once the nose cone goes on!).


Sunday, February 5, 2012
Scuttle
After the engine, the scuttle was the thing I was most looking forward to getting fitted. It signifies the end of a lot of work. It means all of the dash and wiring is completed and tested, and that the interior is completed. It is also the second largest piece of metal fitted to the car after the bonnet so its a big step.


Firstly the scuttle has a lot of different components and hardware fitted before its mounted. This includes the wiper motor drive arms, the wiper spindles, the washer nozzle, the washer hose, the washer bottle and the battery isolation switch. All this work is done on the bench (complete with Steve's foot which has not put in an appearance for a while). You will notice the manual in use, however as per usual it was put away soon after this shot and we winged it.

This shot shows the top of the scuttle with the wiper spindles exposed and the washer nozzle. The wiper mounts are polished metal, which will need to become black to fit in with everything else. As I will be mounting a Shift-I tacho light system on top of the scuttle (under the padding), I have wired some connectors into the existing tacho connector so that I can easily wire in the Shift-I later with the scuttle fitted. We also fitted rubber strips on the top of the body side where the scuttle sits.

From there is was just a matter of sitting the scuttle in place (about 4 times), lining up all the mounting holes, and then fixing the mounting brackets under the scuttle. The battery isolation switch fouled the bulkhead, so we removed some of the aluminum and smoothed out the bottom of the switch. We also drilled a small hole in the bottom of the steering column shim to allow the washer hose through to the washer bottle and pump.

This photo shows the washer bottle and battery isolation switch mounted. Next will be the reservoirs, expansion tank, the Shift-I and the dash padding.

Oh, and I changed the wiper mounts to black too, which looks much better!
Thursday, February 2, 2012
Trying to Finish - Part 3
Over the last couple of nights I got a few small jobs done and a few bigger ones (more interesting!). I managed to check all the front upright torque settings and fit the final R pins. This finishes all the front suspension and steering components.
I got the seat belts back from Hemco with new right angle lower mounts. Many thanks to Andrew and Kerry for personally taking them down to Hemco to have them modified for me, along with theirs. I was then able to refit these into the cockpit. I took the opportunity make large rectangular load distribution plates to fit with the nuts, under the floor.
I got the pedal box mount relined with foam tape and finished mounting it in its final position, with the fabricated throttle mount installed. I also was able to route the throttle cable in preparation for fitting the pedal box cover.
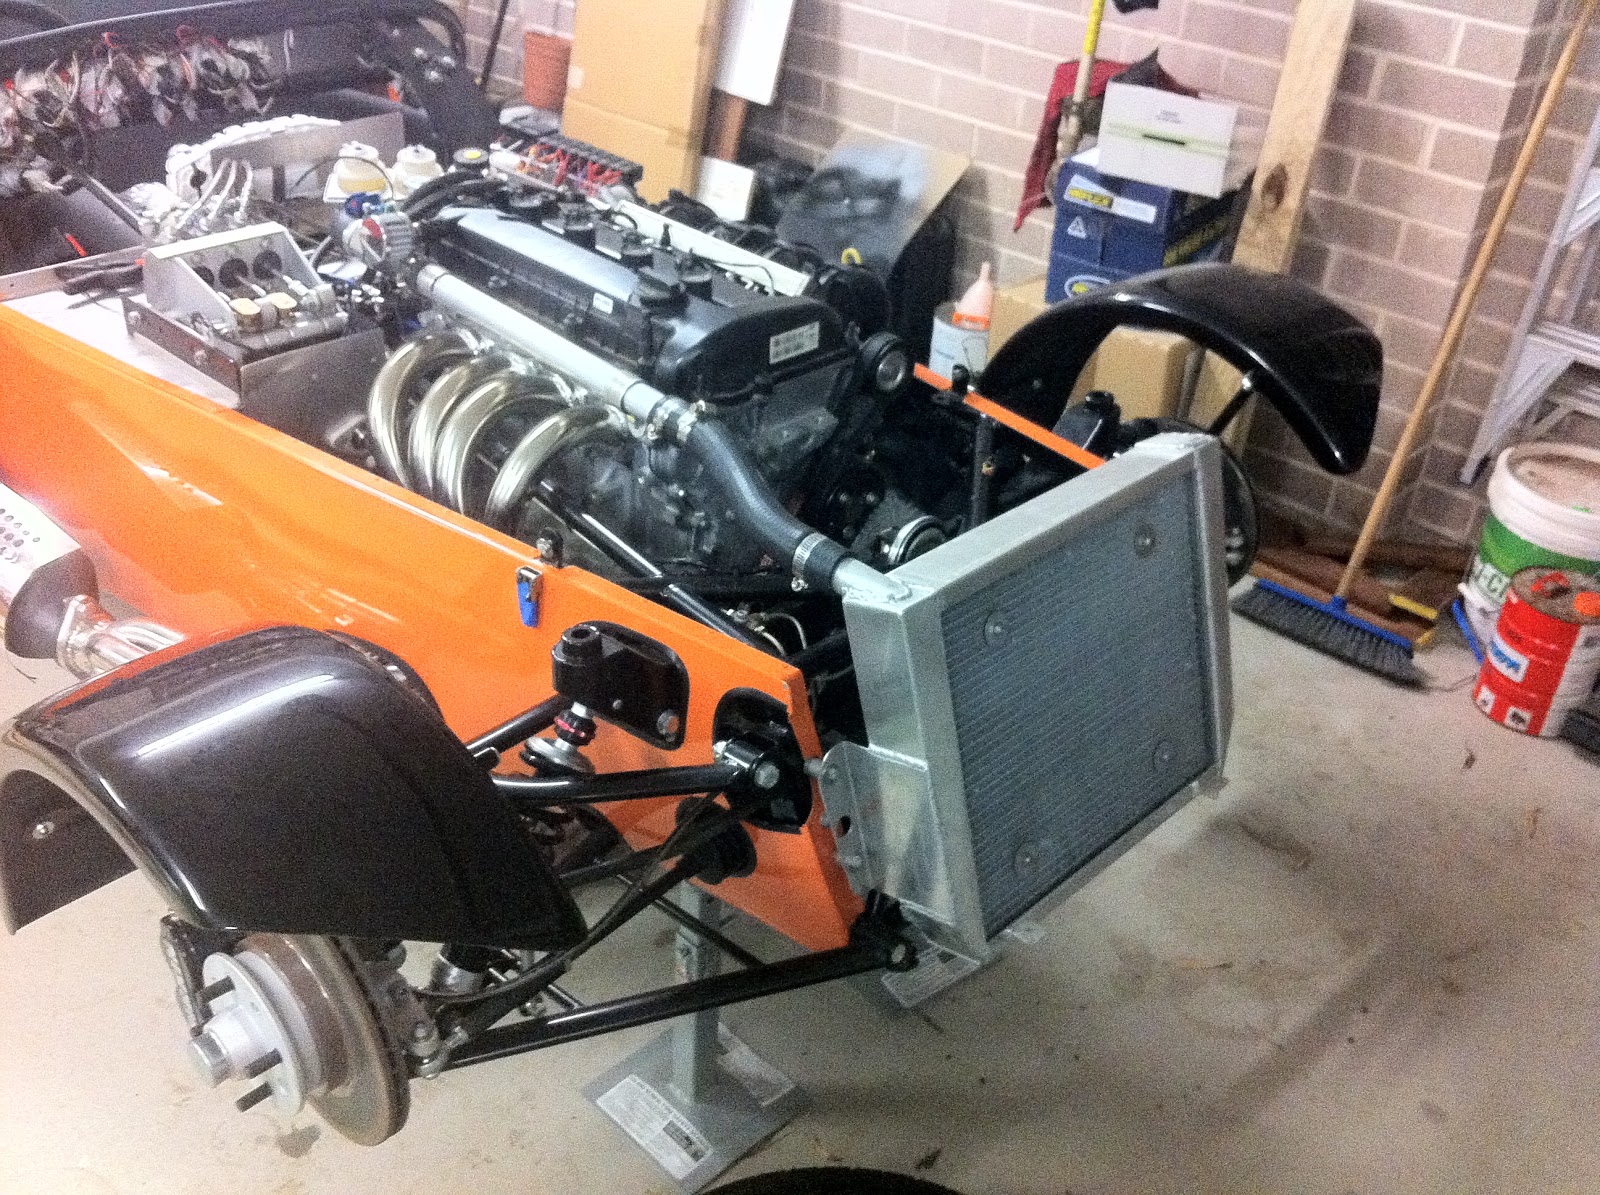
The best part though was being able to mount the front mudguards. I gave them a few coats of stone and chip guard rubberised paint underneath to protect them. I then added the mount brackets and was able to mount them on the car. Looks cools!!!

I got the seat belts back from Hemco with new right angle lower mounts. Many thanks to Andrew and Kerry for personally taking them down to Hemco to have them modified for me, along with theirs. I was then able to refit these into the cockpit. I took the opportunity make large rectangular load distribution plates to fit with the nuts, under the floor.
I got the pedal box mount relined with foam tape and finished mounting it in its final position, with the fabricated throttle mount installed. I also was able to route the throttle cable in preparation for fitting the pedal box cover.
The best part though was being able to mount the front mudguards. I gave them a few coats of stone and chip guard rubberised paint underneath to protect them. I then added the mount brackets and was able to mount them on the car. Looks cools!!!
Subscribe to:
Posts (Atom)