The fuel system will be interesting, as I have never connected anything like this before. Also with my history of leaking fluids on this build, this one is particularly dangerous! Easy parts first. I have remounted the fuel tank back in the car with the fuel pump installed. The two mounting straps are bolted in to hold it down. Next will be to get a plug for the fuel pump wiring, an inline filter, a pressure regulator, a smaller charcoal canister, fit the aero filler and all the fuel lines I need to connect it all up.
With the radiator mounted, I was able to connect the new braided front brake lines to the calipers, and then up the mounting brackets behind the radiators. This then connects the braided lines into the hard lines that run back to the master cylinders. I need to check the routing on Steve's car to make sure that where I have fed the cables around the suspension it correct, and it won't rub on any moving parts or get fouled.
I got the radiator back from being modified during the week. Here is a picture of it face (front) down on the bench. We are looking at the top of the radiator. The mods are required for the Duratec fitting, as the stock radiator is designed for a Zetec, and the water inlet and outlet are opposite. This mean moving the top inlet from the left to the right (you can see where the radiator has been welded up on the opposing side), and moving the bottom outlet from the right to the left. This also allows the outlet to clear the RHD steering rack.
Once unpacked, I could mount the radiator fan on the back of the radiator. This meant reversing the fan direction on the spindle, and bolting through the fins. The bolts are secured on the front with large washers and Nylocs. The wiring needs to point down to drain any condensation. I also needed to bend the bottom outlet a little to clear the body (when the hose is fitted).
Then I was able to mount the radiator on the front of the car. It is secured with 4 bolts, but more importantly, it is spaced with 4 spacers that keep the radiator off the car. The top bolts also secure a pair of brake cable mounting brackets near the front wishbones which allows the front brake lines to be fitted. From here its a case of now adding the hoses and pipes to connect the radiator to the motor, wiring the fan to the body loom, and adding a thermostat switch for the fan, and the water temperature sender for the dash. The bolts on the fan will be shortened once I am done.
Not very exciting! As I didn't have the horn from my donor Focus, I purchased a new one from the local Repco store. It mounts nicely up front out of the way in amongst the chassis tubes, and uses an existing bolt from the front brace panel above the steering rack. As the front loom ran past the horn it was an easy job to connect up the wires and make it tidy. Hardest decision on this part was to select either a Low tone or a High tone horn. Went with Low :)
 One of the great things about building a car like the Birkin, is you join a community of like minded people, who participate in the build process with you by either offering assistance (spilling blood in the workshop), or advice and feedback. A fellow Birkin owner, Maurice sent me some ideas the other night that I was able to incorporate into my build and solve a problem I had yet to confront.
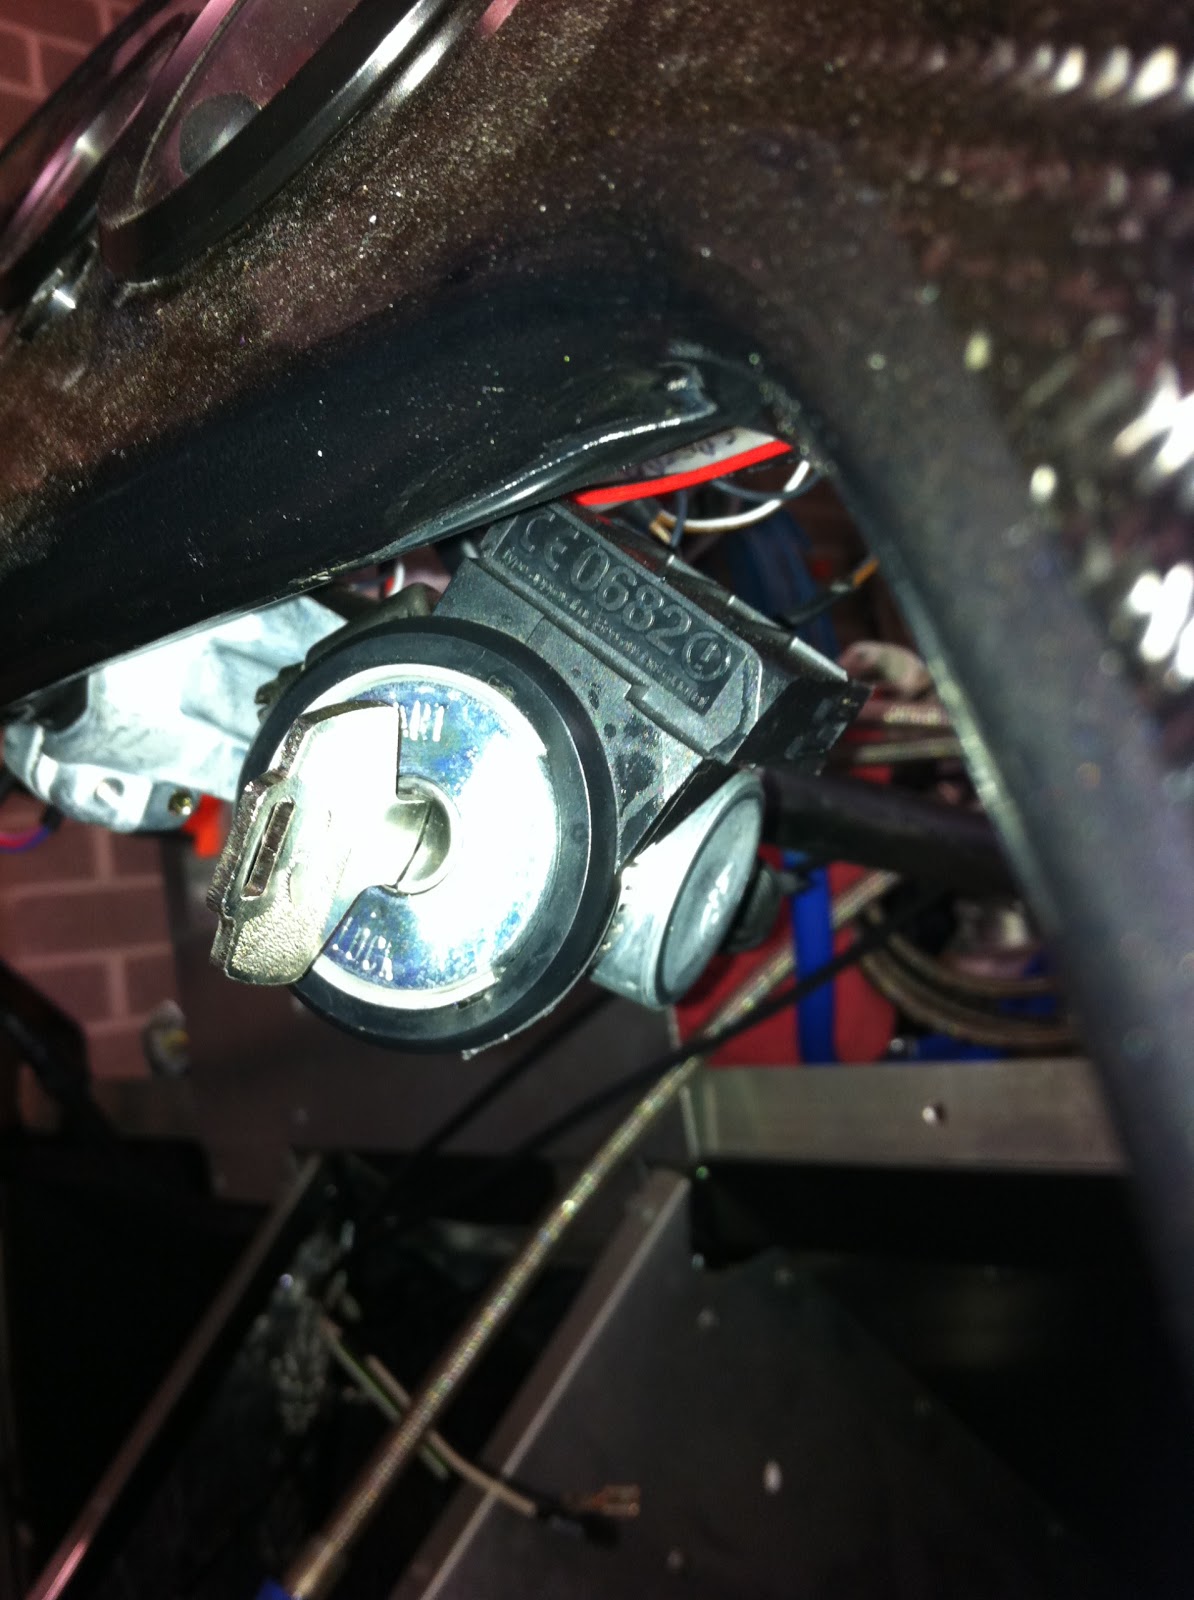
The Passive Anti Theft System (PATS or immobilizer) coil is a black plastic ring that fits around the ignition barrel in the Focus. It is wired back to the dash cluster and ECU, and it reads the immobilizer code in the key and allows the engine to start. The issue here is that I have added an aftermarket ignition which is much smaller than the PATS coil. I had considered mounting it somewhere else under the dash, or behind the centre console, and then just touch to key fob to it as I start the car. The problem with that approach is then I have to have the two keys separate which means I would ultimately lose one.
One of the great things about building a car like the Birkin, is you join a community of like minded people, who participate in the build process with you by either offering assistance (spilling blood in the workshop), or advice and feedback. A fellow Birkin owner, Maurice sent me some ideas the other night that I was able to incorporate into my build and solve a problem I had yet to confront.
The Passive Anti Theft System (PATS or immobilizer) coil is a black plastic ring that fits around the ignition barrel in the Focus. It is wired back to the dash cluster and ECU, and it reads the immobilizer code in the key and allows the engine to start. The issue here is that I have added an aftermarket ignition which is much smaller than the PATS coil. I had considered mounting it somewhere else under the dash, or behind the centre console, and then just touch to key fob to it as I start the car. The problem with that approach is then I have to have the two keys separate which means I would ultimately lose one.
 Maurice's solution was elegantly simple and very effective. He suggested using a thin aluminum sleeve with a cut through it, fitted over the ignition barrel. The PATS coil is then fitted over the aluminum sleeve which gives a snug interference fit, and allows the PATS coil to sit flush with the ignition barrel. The whole thing is then tightened together using a stainless steel hose clamp. Great solution. Thanks Maurice!
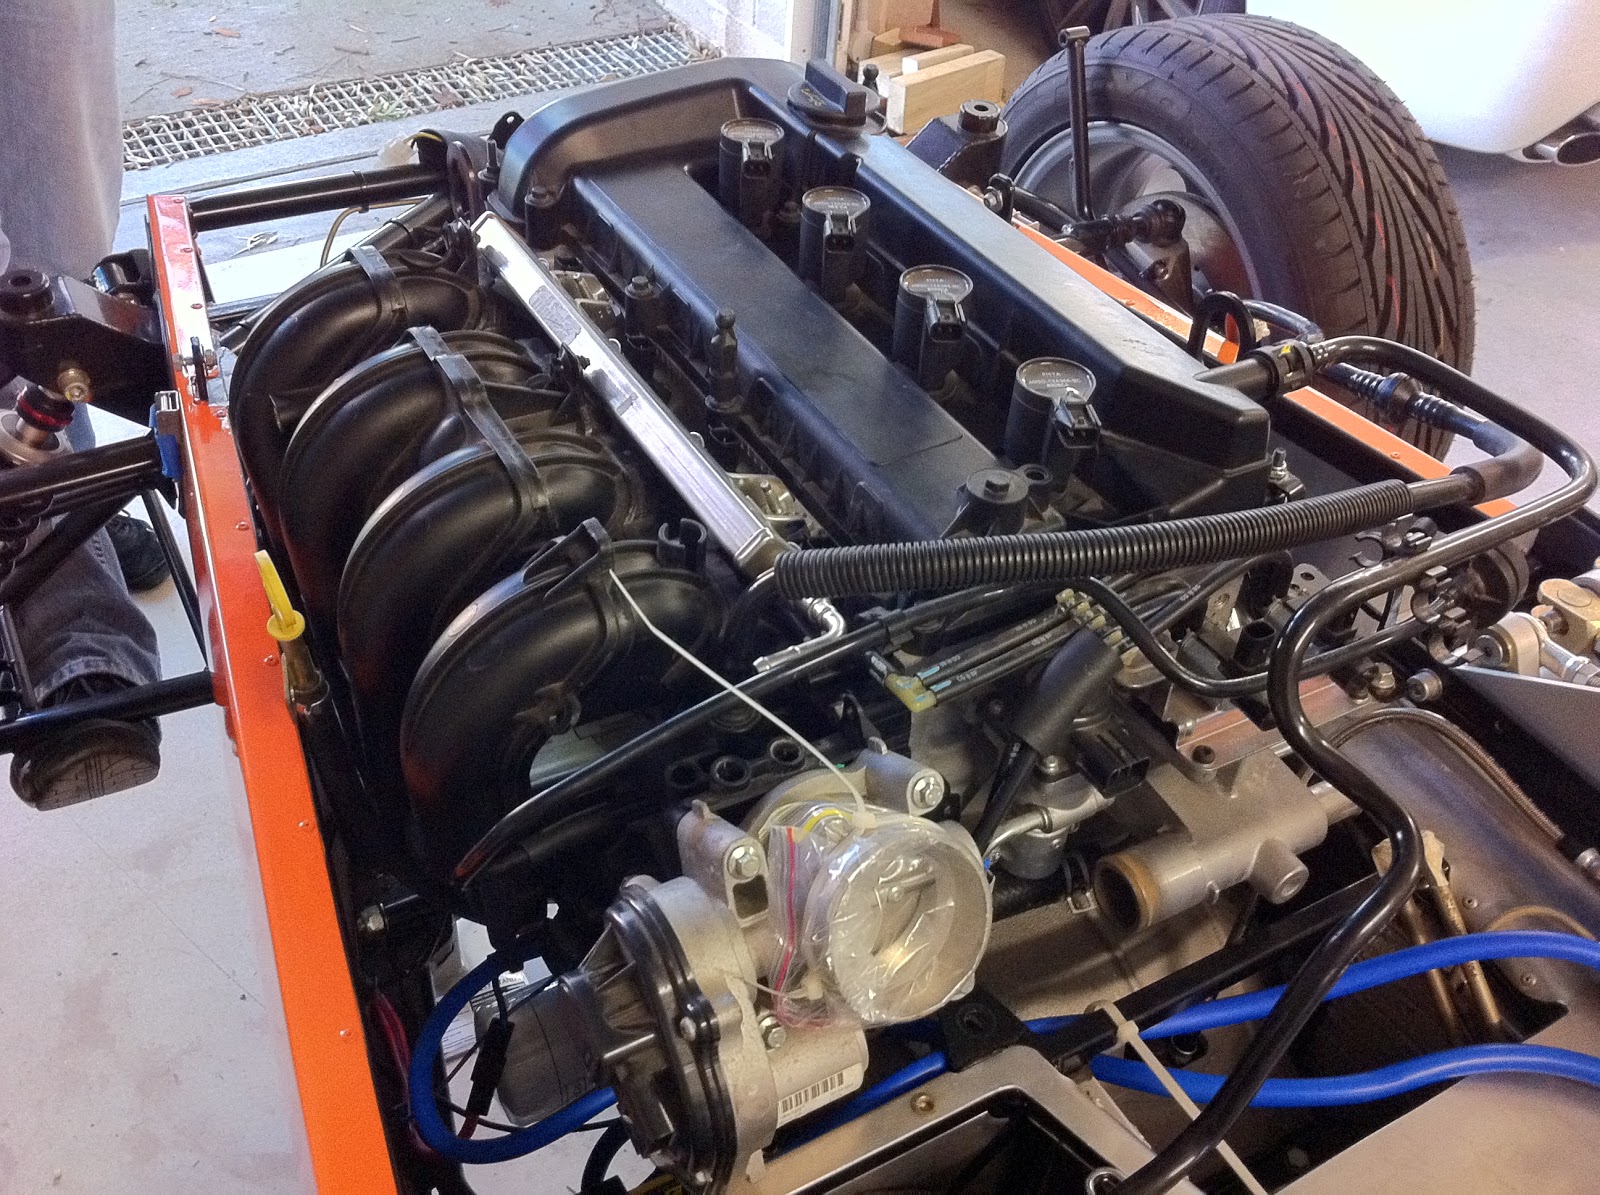
With the drivetrain finished, we could move onto to getting the engine physically finished. This involved putting back on all the parts that were removed while prepping the engine for installation. Given the tight fit in the engine bay, its important to finish off areas that will be hard to get to later on. This meant installing the supply wiring for the battery, and all of the wiring to the starter motor. I have decided to add a master cut off switch for the electrical system, so have routed two cables from the battery and starter motor up to the scuttle where the master cut off switch will be mounted. We have also prepped the connections for the alternator, and cable tied the rest of the loom into its final location.


 One of the great things about building a car like the Birkin, is you join a community of like minded people, who participate in the build process with you by either offering assistance (spilling blood in the workshop), or advice and feedback. A fellow Birkin owner, Maurice sent me some ideas the other night that I was able to incorporate into my build and solve a problem I had yet to confront.