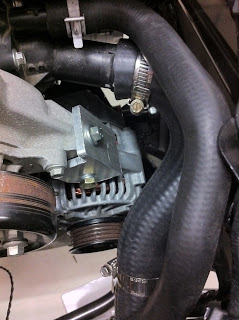
If I want to get the car started soon, I would need to fabricate the brackets myself, using 6mm aluminum plate. In the words of Jeremy Clarkson...."How hard can it be?".
This is prototype 1. The new alternator is mounted with the terminals outboard, and with the 10mm straight through bracket at the top. Prototype 1 was designed to bolt up onto the block about halfway up the block. The issue with this attempt was I cracked the 6mm aluminum while bending it, and it was fractionally forward of where it needed to be,
Here is prototype 1 mounted on the block.
 Here is the alternator mounted on prototype 1. The issue here was the top mount appeared to be to low. This meant the bottom of the alternator was wedged between the frame and the block. Worse still, the bottom mount on the alternator fouled the bottom mount point on the block.
 Here is prototype 2. This was similar to 1, however I heated the aluminum while I bent it to avoid cracking. The alternator was reversed so the top pivot now was an 8mm threaded hole. The new bracket was drilled so that the pivot point was higher. Problem here was the main terminals now contacted the block, and the alternator body still fouled the frame, with little or no adjustment. Overall the alternator appeared to low.
Here is prototype 3 on the alternator, next to the remnants of prototypes 1 and 2. This new approach came about after a few beers and sitting looking at the problem for about an hour. I decided to see if I could use the original alternator mount as a hanger, rather than bolting the bracket to the block down lower. I put a bolt in this mount and hung the alternator on a cable tie to test. Looked OK.
Prototype 3 was fabricated using 40mm right angle that is 6mm thick, shaped to suit the mount and the alternator. This is revision A with the alternator mounted. The issue here was that the bracket fouled the alternator bracket and didn't allow any adjustment. The alternator is spaced backwards with one washer.
 This is revision B of prototype 3. I cut away the bottom half of the mounting face, and this allowed a larger range of adjustment. Prototype 3 mounts the alternator much higher, and allows lots of space either side of the alternator. This version means the alternator doesn't foul the block or the frame. Underneath here all of the alternator wiring is complete and the bottom mount is a 90 degree tab to locate the bottom mount onto the block. Prototype 3 is the winner! Tomorrow I can fit the fan belt and the idler pulley.


No comments:
Post a Comment