Showing posts with label Clubman. Show all posts

Sunday, April 5, 2015

Boot Cover

Something I had been putting off since the build finished was fitting the boot cover. Having looked at a few others and how good a job they had done I figured I could not replicate it. That and the fact that the absence of the boot cover did not impact my driving it, I just never bothered.

Heading out for a drive last Sunday, before I had even got out of the driveway, the smell of raw fuel indicated something was amiss. Backing further out onto the road, the pool of fuel on the driveway and the trail leading to the car confirmed this. Jumping out and getting under I could see fuel coming out under slight pressure. Switch off, clean up and put away.

During the week I stripped out the boot to have a look at the cause, and once I started it could see the hose clamp on the return to the tank from the regulator had failed. 30 second fix to pop the clamp off and fit a new one and then test. Solved. I figured I would put the car back together and go out over the Easter weekend.


So waking up Friday to a wet Easter weekend, I headed out to the garage to put the car back together, but figured I should have a look at fitting the boot cover given I had so much of the car apart. It turned out to be fairly straight forward, only taking about 2 hours to fit, although I had a few issues with the press stud pins and had to source some longer ones. Glued the front flap to the cabin bulkhead while the seats and harnesses were out then refitted the interior. Looks OK although I am not keen to open it for fear of more press stud failures.

Sunday, November 18, 2012

1000km later....

So I have been on the road for about 6 weeks now. I have clocked up nearly 1000km of driving, mainly through the Royal National Park and down the south coast. I am usually getting out for an early morning run most Sundays with a few mates, but I will take it out on Saturdays or during the week at nights if I can find a reason (any reason will do).

I have had a few problems. The front brakes have frozen on a few times after about an hour of driving. I have been told this is potentially a problem with the push rod in the master cylinder fouling the cylinder just behind the piston. I will pull the master cylinder down when I bleed the brakes next and check. Its easily fixed on the road by releasing the push rod lock nut and rotating it slightly.

Also the water temperature fluctuation is bugging me so I am going to move the sensor block and the filler cap to better spots. I will also switch out the pressure cap for a non blocking cap on the filler which should stop the leaks. A front and rear shock are leaking, and they will have to come off and go back to the manufacturer for new seals.

I need to add clutch stop in the pedal box, and I have decided to fabricate a new throttle pedal mount to move the throttle more to the right, freeing up the foot well so I can get a better feel for the brakes. It makes a lot of noises that are unfamiliar but I am learning how it likes to be driven, and what the limits are.

So far I have added a set of 6 point harnesses for track days....the only real modification so far. I am contemplating an aero screen....but not just yet. I need a new muffler and cat first.

Other than those few issues, I love just running around in it. I have a smile constantly, and people at traffic lights always wind there windows down for a chat. You also get a lot of kids waving at you.

Sunday, September 30, 2012

Registered

During the week the car had its final inspection, the Blue Slip inspection which is a  safety inspection for unregistered cars. From here it was a simple matter of organising third party insurance, and then heading off to the RMS with all the paperwork.

An hour or so later I was handed the rego papers and the custom plates I had ordered (after handing over A LOT of money). I was finally registered!!!

I headed home and mounted the plates and stuck the label on the screen! I then headed out for my first little "fully legal" drive. It was nice not having to constantly watch for police. Even though I had previously been on the UVP stickers, driving without plates has a certain risk to it.

So now I am finished, properly! I have assembled, engineered and registered a car that is both drivable, safe and fairly quick. Its been almost a year since the first engine start, when I expected to have the car finished in 6 weeks after the engine was running.

So now I have summer to enjoy driving it, in fact I am about to head out for my first real drive down the coast with a few friends.


I need to thank my wife and kids for their patience and help with building the car and fulfilling a dream! I am very lucky. I also want to thank a few people who have helped with build tasks or advice -  thank you Steve, Dave, Maurice, Bryn, Andrew and Greg and Sonja from Redback Motorsports.  I also want to give a huge thank you to my engineer, Treeve from Kernow Engineering who did an amazing job with the certification.

I would say THE END, but I think this is just the beginning of a new chapter. I will post more about the driving and about the upgrades that are sure to follow.


Sunday, September 23, 2012

VIN Number

Well after working through a number of little fixes and answering a bunch more questions, my engineer completed the engineering report and sent it and the application for a VIN number off to the NSW RMS. And they sent a VIN number back!

Here it is (obviously obscured!), stamped to a plate and fixed using rivets to the scuttle. This means all I have left this week is a Blue Slip inspection for an unregistered vehicle, and assuming I get that, front up to the local RMS office to get finalise rego and get my plates. 

Only a few sleeps now until its finally registered, and just in time for the long weekend and summer!

Wednesday, September 5, 2012

Engineering fixes update

Through out the week I have worked on the car at night to close out the remaining tasks for the engineer. I have completed 7 of the tasks and only now need to add some new repeaters further forward to improve visibility from the back. These were fabricated and welded up yesterday and I just need to tidy them up, paint, fit and wire.

I got to have a really good drive this afternoon with some friends, and it was nice to enjoy the spring weather and not have to worry about noise or overheating or any of that other pre-test crap!


Sunday, June 3, 2012

Workshop Fitout

On top of the lessons learnt, I thought I would share the additional tools I have used or added to the workshop during the build. This will give new builders an idea of what is needed beyond spanners.

  • Engine crane - rated to 750kg with adjustable boom and castors. I used this to lift the car a lot as well when fitting the engine
  • Engine stand - for dressing the engine before it goes in the car
  • Trolley jack - spend as much as you can and get one with as much lift as possible
  • Chassis stands - height adjustable with fine screw adjustment.
  • Digital vernier calipers
  • Hex head sockets - better than Allen keys!
  • Torque wrenches - I have two, one with a smaller range and one with a much larger range for big jobs like flywheel bolts
  • Sharp set of side cutters
  • T-bar - with connectors for sockets or hex bits
  • Stepper drill bits - for carefully enlarging holes out to as big as 22mm
  • Quality soldering iron
  • Electrical wiring crimper (good quality)
  • Auto electrical specific multi-meter
  • 1mm metal cutting wheel for the grinder
  • Fine tip paint pen in a bright colour - for marking position or marking torqued nuts/bolts
  • Good files for rough shaping of aluminum or steel brackets
  • Dremel - used for everything! From cutting, finishing, sanding, grinding
  • Rivnut gun - an expensive luxury best shared with a friend!
On top of this I had the usual set of ring and open ended spanners, sockets and screw drivers. I added quite a few larger spanners and sockets for jobs like fixing the upright ball joints, or tightening hub nuts. Most of these can be added as needed, but I can't emphasise enough the importance of using the right tool for the job. A vice and bench grinder is also handy.


One of the things I thought I would use a lot more was my compressor. I already had a rattle gun and I also got an air powered socket wrench. I guess the capacity and duty cycle was a little low on my compressor as it was more of a pain to use than being of any great benefit. I ended up using a cordless driver with socket attachments a lot more than anything else.


Monday, May 28, 2012

Shakedown - Part 1

I have made this post Part 1, because I reckon there is going to be a few more like it. I managed to reassemble the car after reconnecting the speedo wire so I could do the calibration. The other thing I needed to fix was the leak from bottom radiator hose. I popped the nose cone off to get to the hose clamp, and found it was not tight. I had put all the front hoses in long before I put coolant in, and never checked the tightness. Quick check of all the hoses around it and I found a similar story....oh well!


With these two problems fixed, I was able to take the car out to do the speedo calibration and just generally enjoy a drive. I organised to meet Steve and Dave, fellow clubman drivers at Steve's place which is happily about 20km away. On the  way out I did the 1km autocalibration test and found it needed 3580 pulses. With that done I had a functioning speedo.


The car went well but the trip exposed a few more problems:

  • The thermostat appears to be stuck closed....so the car ran very hot!!!
  • The muffler mount bent then broke
  • One of the headlights stopped working.
All in all a good run. We got to take some photos and it was nice to have the car out somewhere other than my front yard, especially around other Clubbies. Not major problems to fix, and I expect I will uncover more problems on subsequent runs. Best part was coming home in convoy with two other Clubbies around me!

Friday, May 18, 2012

Unregistered Vehicle Permit


A UVP let's you drive the car on the road "legally" while it's still unregistered. It requires an authorized safety inspection (pink slip) and a trip to the RTA. 


The Birkin passed it's safety inspection and the nice lady at the RTA issued me with my UVP which is now proudly stuck on the windscreen. 


The only catch is it can only be driven on nominated trips for specific purposes....but at least I can now officially move it around on the road from place to place to finish off the engineering and rego process without having to use a trailer...........................................like this!


Suspension Setup


I have given Redback Motorsports a rap before, but I am going to do it again. I dropped the Birkin off on Saturday to have Greg give it a once over and also to properly setup the suspension, steering and brake balance. Over a few days he setup all of my wheel cambers, wheel toe-in, ride height, spring preload and damper rates to suit a first time Clubman driver. He also checked my brake bias setup, adjusted my steering rack and wheel position, and sorted out a few issues on the sway bars. He also rang my engineer to discuss specific tests that would be carried out on the car come engineering time, and then made sure that my car was configured accordingly. 


Greg engineers some of the quickest and best sorted race Clubmans in Australia. He has a wealth of knowledge and best of all he is a great guy to just drop in and have a chat and a cuppa with. I am lucky to have access to such a skilled engineer so close to home, and I feel privileged to have his expertise applied to my car.


The car now feels properly secure on the road, and it turns in much more predictably and consistently than it did last week. It is also riding much nicer over broken pavement and changes in surface. 


If you live in or near Sydney, and you want your Clubman sorted... properly sorted ........ take it to Greg at Redback Motorsport!


Sunday, April 15, 2012

Mirrors

The mirrors should have been easy. Two wing mirrors screw into the windscreen frame, one main mirror glues onto the windscreen. The wing mirrors are EMGO motorbike mirrors. All good except I was sent Yamaha mirrors which have a right and left handed thread. The Birkin windscreen only has right hand threads. So I had to replace these with the same mirror, only both with right hand threads. The main mirror, I painted the body black (as always) and used an industrial glue to attached it to the screen.

Sunday, April 8, 2012

Seatbelts

The missing piece of the seatbelts was the top mount bolt. This was a 7/16 UNF bolt (supplied new by Greg at Redback Motorsport). With the bolts in hand I was able to mount the top guide and put the covers on. Seatbelts now work!

Thursday, March 29, 2012

Almost there....


Well after nearly 18 months this is what it looks like now. Only a handful of things to do so that I can get the engineering process started and get it registered. What's left to do?
  • Fit rear tail lights onto the mudguards
  • Refit the muffler (new one coming)
  • Align and tighten headlights
  • Recable the pilot indicator (they are crossed over)
  • Install two more mirrors (left one is already on)
  • Add number plate mounts
:)

Tuesday, March 27, 2012

Windscreen Wipers

The wipers went on quite a few weeks back, but they didn't work as expected. First problem was that I didn't interpret the manual correctly on how to align the linkage to get them to operate in the right cycle. Second problem was that I stripped one of the nuts getting them back up, meaning I had to cut the nut off, which damaged the mounting spline. Luckily I had a spare linkage, so I dropped the damaged one out and replaced it. To get the cycle right I ended up climbing under the dash in Steve's Birkin, and copied how it was aligned and connected to the motor. We also made up some markers to fit to the spindles to get the cycle right. Once we were comfortable with the sweep of the arm, we bolted the arms into place and fitted the bolt caps. Must remember not to tighten things before I check how they are supposed to work.


Friday, March 16, 2012

Roll Bar and Boot Lining

I have been desperate to get the boot lining off the garage floor and into the car for nearly 12 months. It is made of fairly thin GRP, and has two protruding strips where it meets the cockpit. Every time the kids went in the garage I was worried that someone would walk into and snap those strips off!

To get the boot in meant finishing all the rear wiring and lighting, checking all the suspension bolts, putting a moisture trap line on the fuel reg, checking all the fuel lines and clamps and then remounting the fuel tank in its proper place. When I went to mount it, I realized I had to lift out the cockpit side panels to get the front edge of the boot lining under the side panels. The side panels had already been bolted in place under the scuttle which meant some disassembly. However I soon had the boot lining in place.

The roll bar sits on top of the boot liner and bolts into the rear body rail and onto a pair of mount plates high on the frame behind the seats. Securing the roll bar uses huge M10 capscrews and requires manipulation of a few chassis cross members to fit it and get the capscrews in. I now need to mount the high level light now and get the wiring run inside the roll bar.

Saturday, February 25, 2012

Windscreen

The windscreen mounts were the first holes I drilled into my shiny new aluminum car back in 2010, before paint. Lining up the holes for windscreen mounts was a little tricky and it would be some time before I got to see if I had them right. The windscreen mounts and windscreen frame were painted gloss black at the time that the car was painted. Surprisingly the mounts fitted well with no modifications needed. I put them in finger tight so I could trial fit the windscreen. With the windscreen roughly in place, I could drill two holes in the scuttle either side for the windscreen demister. Then it was just a case of getting the rest of the family to hold the windscreen in place while I secured it inside the windscreen mounts. 
The windscreen fits fairly snugly, although there is a small gap between the bottom of the left mount and the screen which is making it hard to get the capscrew to bite into the thread. I will probably just use a longer capscrew for this. Tightening the screws damaged the paint a little on the mounts, so I will need to do a few touch ups and I will also paint all the cap screws black as well. Now its all torqued up correctly ready to be wired in. I can now fit the wiper arms onto the mounts as well.


Bonnet

Getting the bonnet on is a big step, one that signifies how close to the finish I am. I ran adhesive strip down both sides of the engine bay to cushion the bonnet, but I have not put tape on the scuttle or nose cone lips yet, as this needs to be thinner. The front left corner is not fitting well yet, and will need a little bending to get it to secure properly. It is also flaring a little at the back on the sides of the scuttle, but I believe this is a normal Birkin thing. I put the rubber trim that it came with back on across the front lip, but will probably remove it as the black line across the orange looks naff.

Thursday, February 23, 2012

Nose Cone

When I put the nose cone on last time I scratched the hell out of the sides by fitting it the wrong way! So I was very wary of fitting it the final time. I taped up all the areas that could get scratched and mounted it from the bottom up. It went on somewhat easier than last time..... 4 bolts later and it was on and done up tight, with no more scratches! It may need to come off to tighten the indicators after I drill the holes in the sides.

Saturday, February 11, 2012

Scuttle Fitout

With the scuttle mounted, I am able to finish off all the under the bonnet jobs. There are a number of things that get mounted directly onto the scuttle under the bonnet line.


The brake and clutch reservoirs are bolted directly onto the scuttle and the low fluid warning light cables are fed up through the bracket and onto the switches.


Finishing the scuttle also means getting all of the electrical connections finished. The fuse rail is now secured in the fusebox with a rivnut and a set screw in the passengers footwell. The fusebox lid has been modified to fit around the bottom of the throttle body and is screwed onto the bulkhead.


On the far side away from the scuttle is the washer bottle. Its line runs from the pump through a small hole in the bottom of the steering column bush. The wiring feeds through a grommet in the scuttle below the tank and then up inside the bracket to connect to the pump. On the passengers side is a 1 litre expansion tank, which is mounted as the highest point in the cooling system. It has feed lines from the block and main cooling pipes, and returns to the thermostat. All of the cooling lines run down behind the block. Its all now tidy enough to fit the bonnet (once the nose cone goes on!).


Sunday, February 5, 2012

Scuttle

After the engine, the scuttle was the thing I was most looking forward to getting fitted. It signifies the end of a lot of work. It means all of the dash and wiring is completed and tested, and that the interior is completed. It is also the second largest piece of metal fitted to the car after the bonnet so its a big step.


Firstly the scuttle has a lot of different components and hardware fitted before its mounted. This includes the wiper motor drive arms, the wiper spindles, the washer nozzle, the washer hose, the washer bottle and the battery isolation switch. All this work is done on the bench (complete with Steve's foot which has not put in an appearance for a while). You will notice the manual in use, however as per usual it was put away soon after this shot and we winged it.


This shot shows the  top of the scuttle with the wiper spindles exposed and the washer nozzle. The wiper mounts are polished metal, which will need to become black to fit in with everything else. As I will be mounting a Shift-I tacho light system on top of the scuttle (under the padding), I have wired some connectors into the existing tacho connector so that I can easily wire in the Shift-I later with the scuttle fitted. We also fitted rubber strips on the top of the body side where the scuttle sits.

From there is was just a matter of sitting the scuttle in place (about 4 times), lining up all the mounting holes, and then fixing the mounting brackets under the scuttle. The battery isolation switch fouled the bulkhead, so we removed some of the aluminum and smoothed out the bottom of the switch. We also drilled a small hole in the bottom of the steering column shim to allow the washer hose through to the washer bottle and pump.


This photo shows the washer bottle and battery isolation switch mounted. Next will be the reservoirs, expansion tank, the Shift-I and the dash padding.


Oh, and I changed the wiper mounts to black too, which looks much better!

Thursday, February 2, 2012

Trying to Finish - Part 3

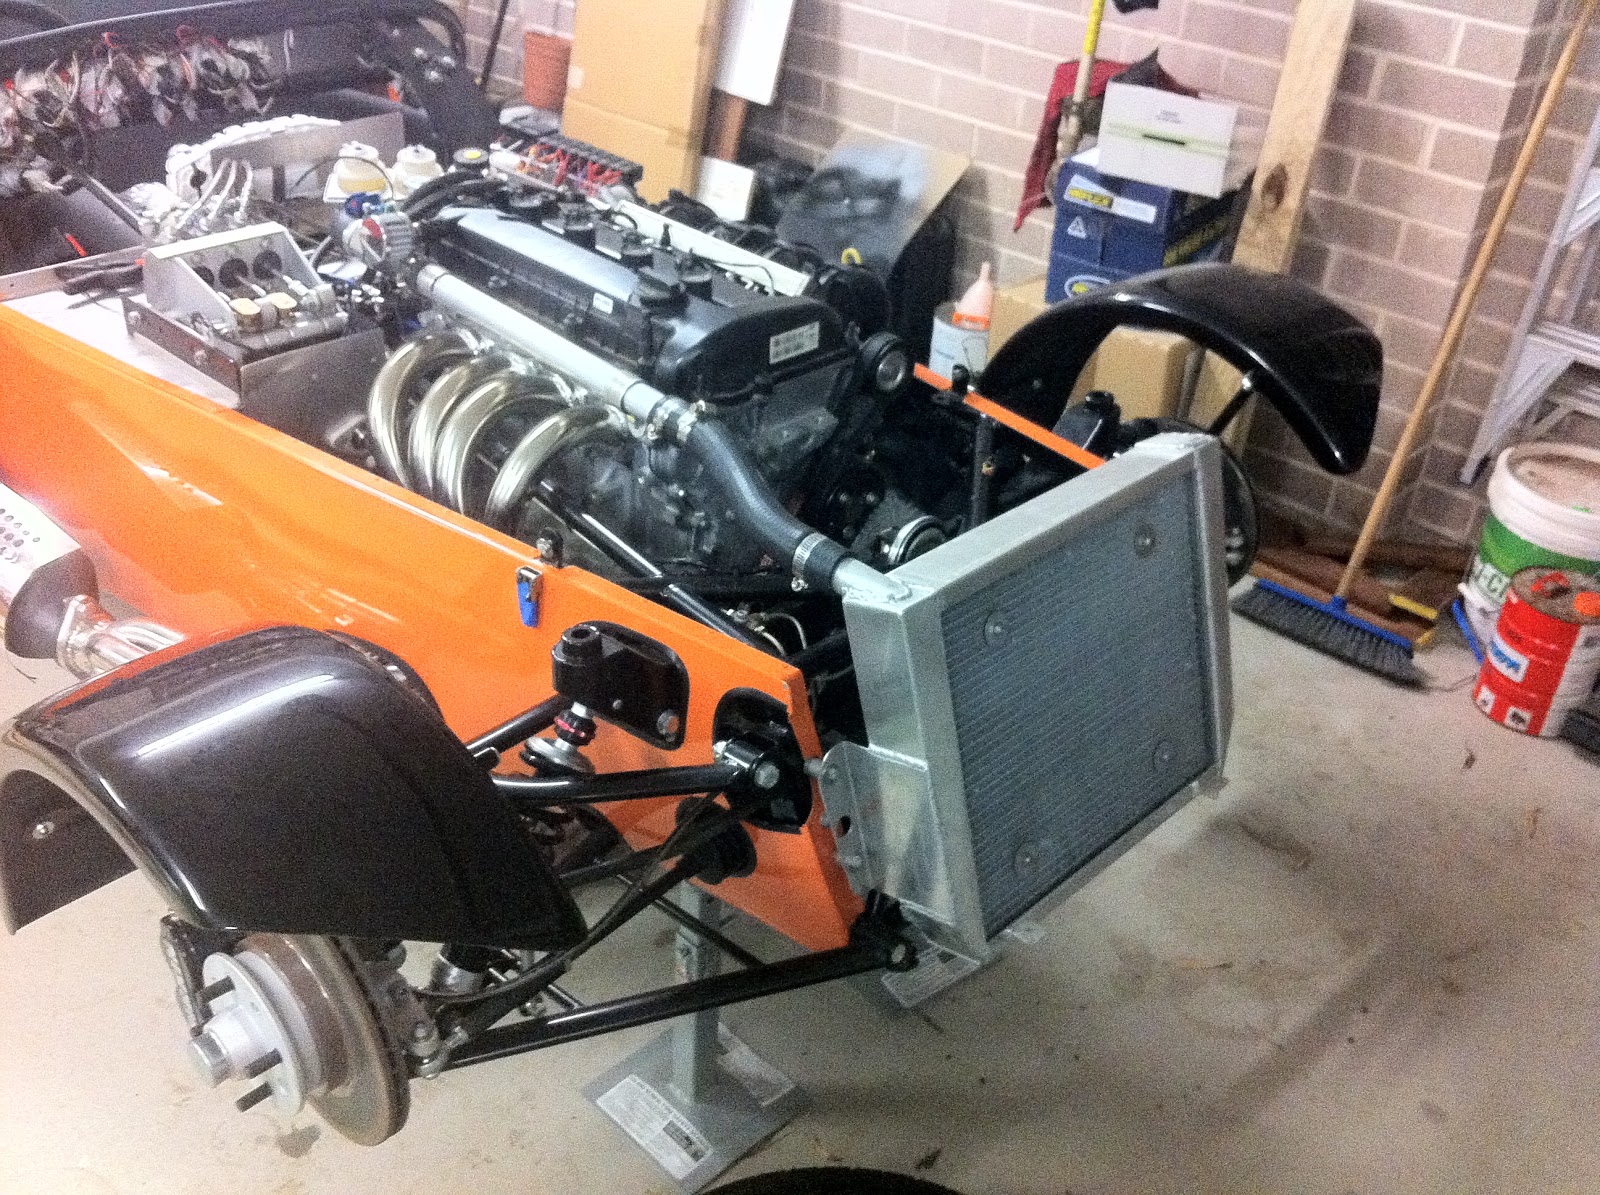
Over the last couple of nights I got a few small jobs done and a few bigger ones (more interesting!). I managed to check all the front upright torque settings and fit the final R pins. This finishes all the front suspension and steering components.


I got the seat belts back from Hemco with new right angle lower mounts. Many thanks to Andrew and Kerry for personally taking them down to Hemco to have them modified for me, along with theirs. I was then able to refit these into the cockpit. I took the opportunity make large rectangular load distribution plates to fit with the nuts, under the floor.


I got the pedal box mount relined with foam tape and finished mounting it in its final position, with the fabricated throttle mount installed. I also was able to route the throttle cable in preparation for fitting the pedal box cover.


The best part though was being able to mount the front mudguards. I gave them a few coats of stone and chip guard rubberised paint underneath to protect them. I then added the mount brackets and was able to mount them on the car. Looks cools!!!